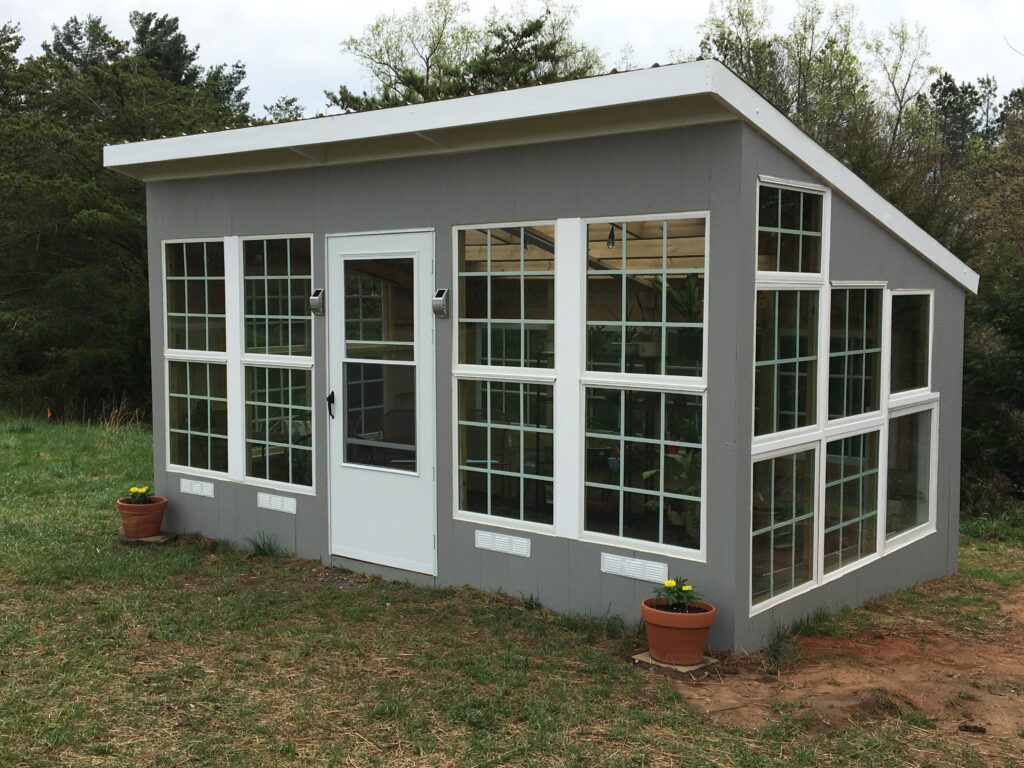
Are you a gardener? Artist? Woodworker? Just need a She Shed or Man Cave? Running out of useful space? Here’s a budget friendly DIY greenhouse project that can utilize repurposed materials and look great too!
We built this 10′ x 16′ greenhouse for about $1,800 with repurposed items, supplies from old projects, and what we purchased new and on sale. Lumber and screws have increased the most since then. Yet, this could still be built for around $2,200.
Greenhouse Repurposed Materials & Costs

We needed windows…lots of windows! However, we spent just $120 on windows. Most were $5 each at our local Habitat ReStore.
As I looked around, I continued to find savings on many items I needed.
Lowe’s has a clearance area in their paint section. I picked up a 5 gallon container of mistinted gray for the exterior. It was only $30, but the regular cost would have been $115.
The storm door was in the clearance/dented area for $30, so that was a savings score.
Our electrical costs were only $15 for receptacles since we already had wiring on hand. However, you can avoid the expense of wiring by taking advantage of someone’s wire leftover from a project. I see wiring at estate/garage sales and on Craigslist and Marketplace regularly.
I found my rain barrel for $20 on Facebook Marketplace. It was food grade and perfect for water collection. We connected it to the back gutter, and therefore it rarely runs out of water. We installed a nozzle on the bottom for filling up watering cans.
Additional Greenhouse Materials & Cost
Lumber, posts, concrete for the posts, screws, and vents totaled $500.
My total for hardiboard, air compressor nails, caulk for around the windows (lots of tubes), screws, and plastic (for behind the hardiboard) was $350.
I picked up a $20 LED light fixture from Costco Wholesale.
Venting the space is important during warm weather. We installed vents that are covered during the winter months. Since heat rises, we installed a vent at a height of 5.5′ and a fan in front of it that is connected to a thermostat. Our fan came from Amazon for under $20 https://amzn.to/3lB3r3L. However, I recently added this fan to my chicken coop. It’s double the cost, but 2 fans move more air and I like that it’s solar. Fans also help remove warm air faster which is necessary on extremely hot days. https://www.amazon.com/gp/product/B095KBWXFJ?ie=UTF8&psc=1&linkCode=sl1&tag=lifeinthecoun-20&linkId=cb807fd160a925d230504bf1c41d7ebd&language=en_US&ref_=as_li_ss_tl
Roof Cost & Project Materials
Our local sheetmetal distribution center sells sheetmetal seconds for $1-$2/linear foot, depending on the condition. They even cut requested lengths at no additional charge. Sheetmetal was $150 including matching screws.
Corregated foam self adhesive strips nicely fill the corregated openings on the roof edges. They are about a dollar per strip. I found that caulking around those strips prevented bees and flies from finding their way inside.
Two polycarbonate panels for the roof totaled $40. They allow just the right amount of light in.
Woodstove/Heat Source
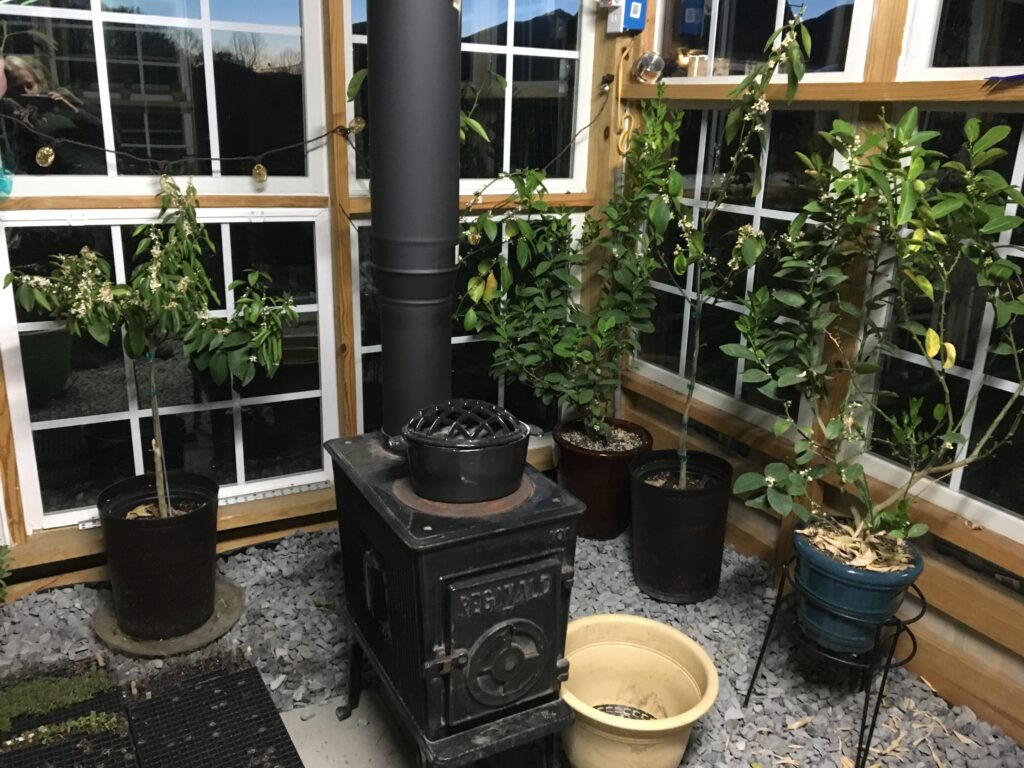
Even on extemely cold days, the woodstove heats the space nicely. It’s cozy to say the least. We picked up this nifty little stove off of Facebook Marketplace for around $150. It’s 28″ H x 14″ W x 20″ L. I looked for an even smaller woodstove, called a Caboose, or just a small pot belly, but at the time this is all I could find and it works great.

Additional woodstove supplies like flue piping and the pipe cap were another $75. I picked up my pipe and cap from Lowe’s. To properly seal the flue hole on the metal roof, I ordered a high temp silicone gasket. It was perfect for metal roofing. The flue pipe from the woodstove fed right through it. The cost for this ranges from $35-$85, depending on the brand and pipe size you have. You don’t have to be exact, just cut the appropriate pipe diameter already marked on the gasket. https://amzn.to/3Kcm6Nt
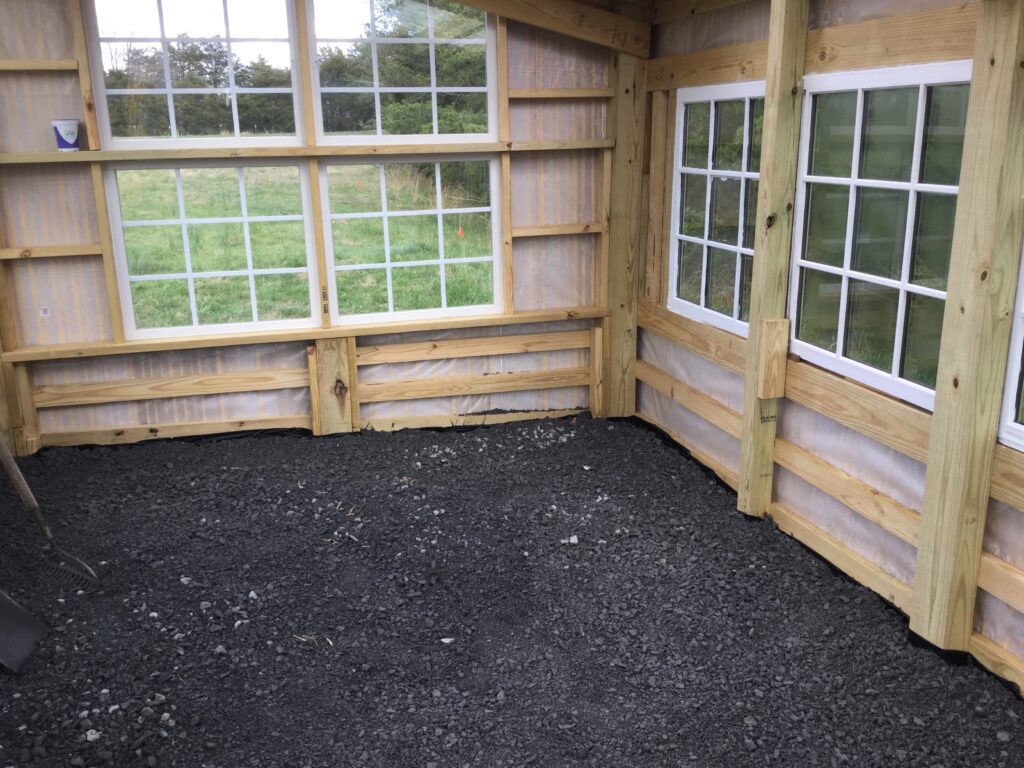
Gravel Floor
We needed flooring that wasn’t dirt, and concrete was not in the budget. I also wanted something that could handle water/moisture and not grow grass or weeds. Gravel and landscape fabric were relatively inexpensive at only $60. Our local hardware feed and seed store loaded 1.5 tons of gravel in our trailer. I covered the ground with landscape fabric prior to adding the gravel. In hindsight, I’d cover the floor with thick plastic instead. Also, I’d cover the floor in gravel, prior to putting hardiboard on the walls. The sawdust generated by framing would have made a mess of the gravel, but putting the gravel down just before adding the hardiplank would have made adding the gravel much easier. Instead, I shoveled gravel from the trailer into a wheelbarrow and made multiple trips through the greenhouse door opening.
Conveniences
Double doors – I’ve only added a few things since we constructed this greenhouse. While the storm door is one of those doors with the glass that can be raised up, I found that on warm days, we benefitted from more airflow. As a result, we installed a full screen door on the inside too. The stormdoor swings to the outside and the second screen door swings to the inside. Propping the storm door open, and closing the full screen door, prevents bugs from flying in and allows for ideal airflow on the warmest days.
Hardiboard Siding – Need a certain length for the boards? It’s easy! Just measure and mark the boards. Then, all you have to do is scribe the boards with a straight edge and utility knife. No power tools needed for cutting!
Things to Consider
Height – The front of the greenhouse is 8′ tall sloping to 5.5′ tall at the rear. When planning the height and potential slope of the roof, consider the purpose of your space and the height of those who will be using the space.
Sun Protection – I made three long covers to hang under the polycarbonate panels on the ceiling. This shades extreme heat. I made them with thick screen and a grommet kit like this one https://amzn.to/3Eanyfl. This cuts down on heat from the blazing sun during the hottest summer months.
Convection Heat – I also wanted to circulate woodstove heat on cold days, and this nifty little fan did the trick https://amzn.to/3E4GBI4. It works like a convection fan and begins to turn as the heat from the stove starts to rise. It was $34 and I’ve been really pleased with how well it works.
Woodstove – Spend a little extra on your woodstove flue cap and buy one with a screen. I was shocked in the spring to clean out the stove for the season, only to find that a couple of birds made their way down the flue. This is completely preventable.
Why We Built This
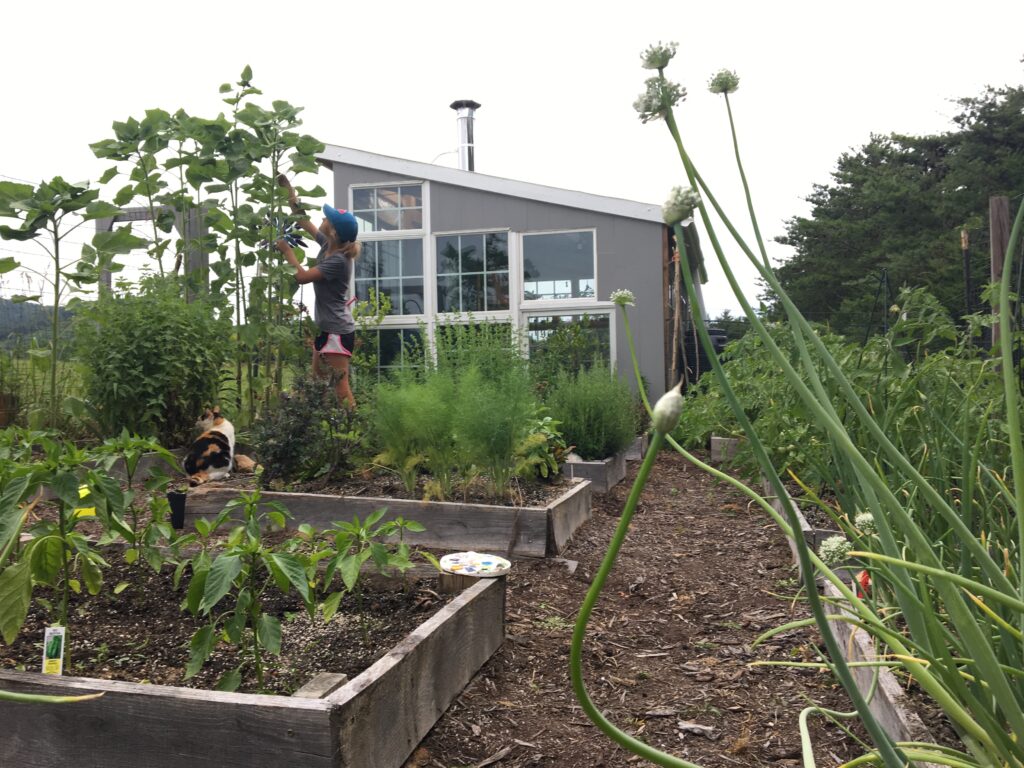
Our 15-year-old daughter needed a place to pot plants and hang out. That’s how this project was initiated. She had been working at a local greenhouse for about a year and thought she might want to pursue a future in some kind of horticulture industry.
We followed her interests, delighted that she wasn’t all consumed with boys, and built this greenhouse for her. Her love of “all things plants,” along with her horse, Kubota, were great distractions from the drama of boys. We were eager to help her pursue her passion. It worked…for a while.
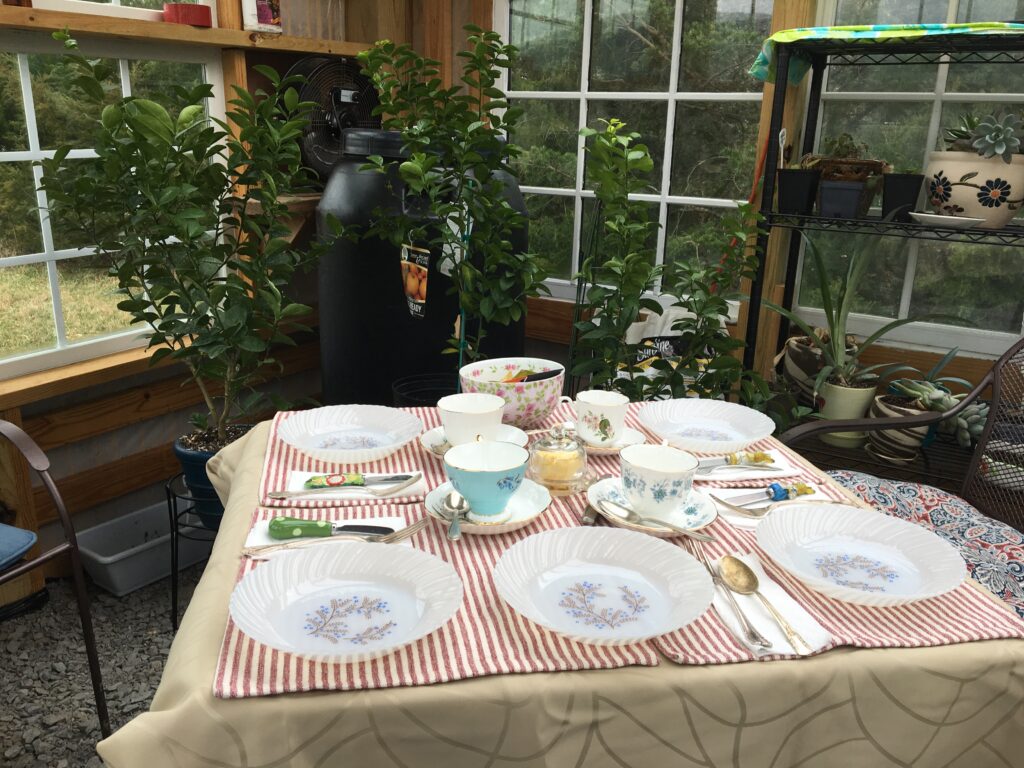
Now that she’s a college student, the space is being repurposed for art and messier projects with my youngest daughter, tea parties, or as a great place to get away with a friend who is in need of a quiet place to talk.
Repurposed
We utilitze this great space year round. It has so many possiblities. For example, it would be an ideal studio for an artist. Not only that, it would be a useful space for a mechanic or woodworker. It’s a great space for hobbies in general. Just know that metal roofing condensates as the temperature on the outside is colder than the inside. That’s where my shade cloths have also come in handy, they stop condensation drips from extreme temperature fluxuations.
We’ve strung lights all around and had the kids’ Grammy out for tea, scones, and lots of laughter and conversation. Even in the middle of winter, we can get the space comfortably heated in the 70’s after we fire up the woodstove for about an hour or two (depending on the outside temp). It’s still our “go to” space for spring and fall planting. Nestled in the right space, with the right landscaping, this could be a haven in any yard – even the most populated areas.
2 Replies to “Greenhouse DIY Project”
Comments are closed.