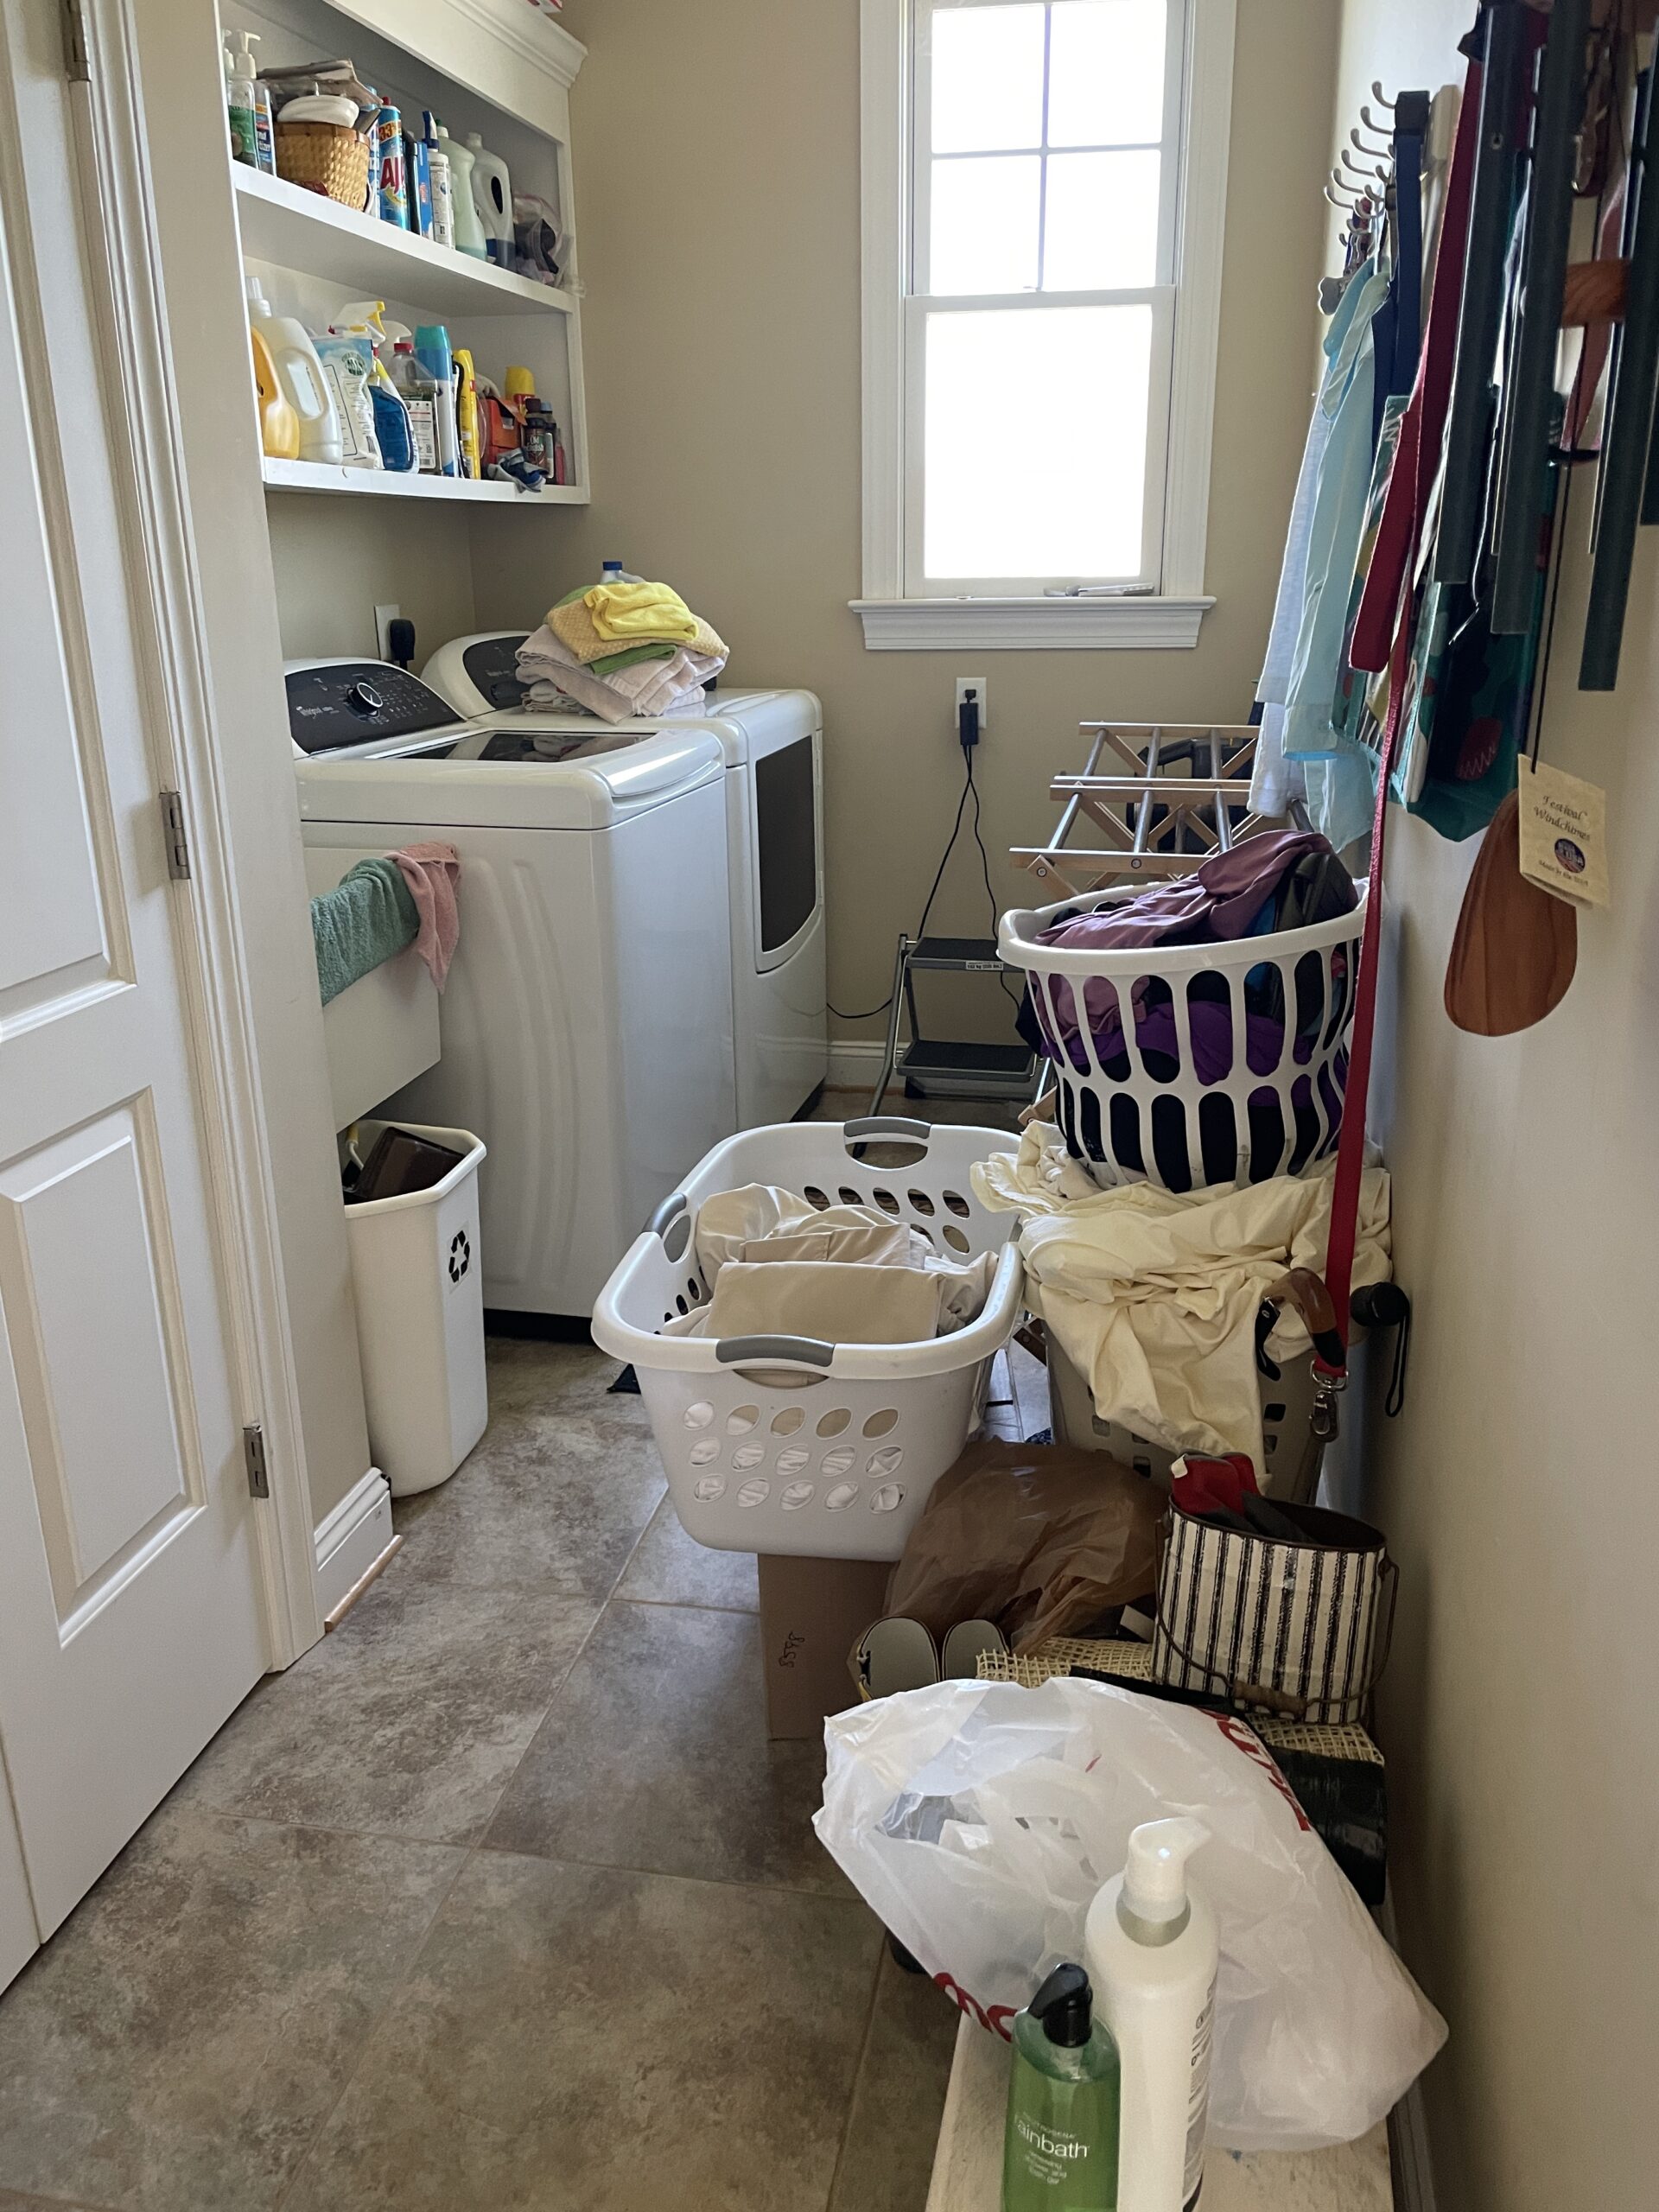
Here’s an easy laundry room makeover that’s functional, inexpensive, and maximizes a narrow space. This laundry room was cluttered, crowded, and disorganized. The space had become a “catch all” and was in need of an update. Aside from improving the space’s purpose, the main goal was accomplishing a laundry room makeover on a budget. Challenge accepted!

Laundry Room Goals
A quick glance revealed the challenges of the room size, and therefore, goals for the space. Assessment of the room proved that storage was important, along with hanging wet and dry clothes. However, the narrow room size presented challenges.
Narrow Space Solution
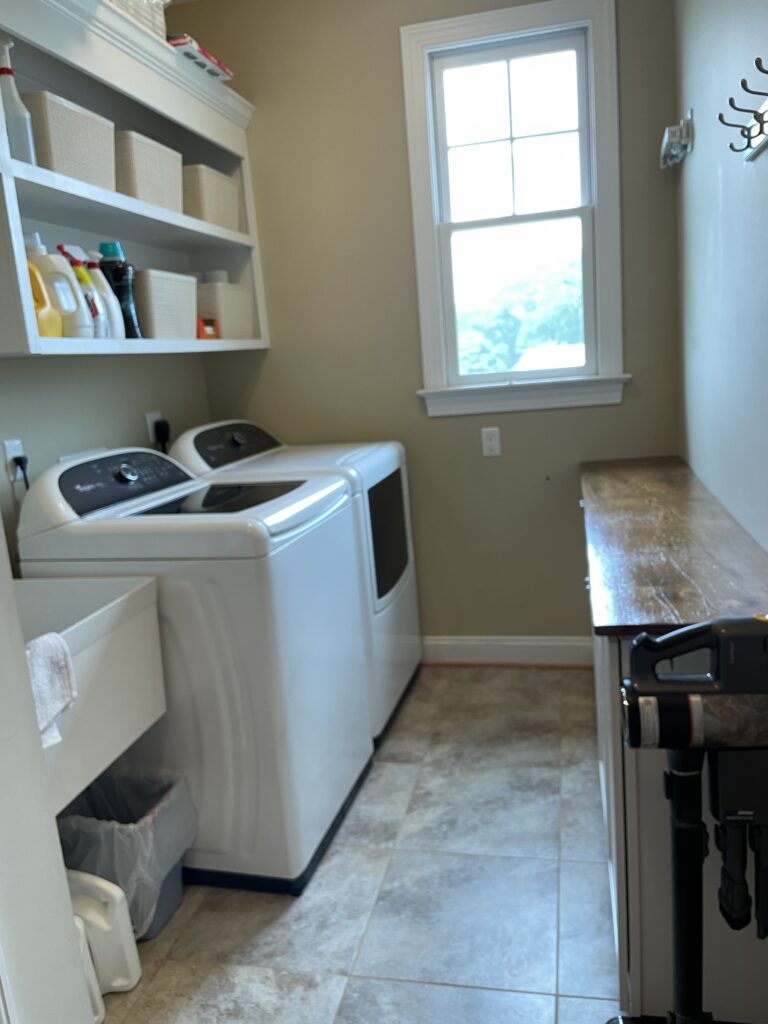
The space between the washer/dryer and the wall was unforgiving. Installing base cabinets would have required 24 inches just for the base cabinets, and would not have allowed for opening the dryer door all the way. Instead, two 12″ wall cabinets provided a solution for storage that was asthetic and functional.
Modifying the Cabinets
I installed 4 square couch legs onto the cabinet bottoms. Removing the screw from the middle of each foot, eliminated installation obstacles. Next, I drilled through the inside base of the cabinet, and secured the cabinet to the feet. While the style of feet worked well for this space, there are various shapes and sizes from modern to traditonal that would look stylish on the base of a cabinet, matching the style of any room.
Benefit of Using Feet Instead of Building a Base
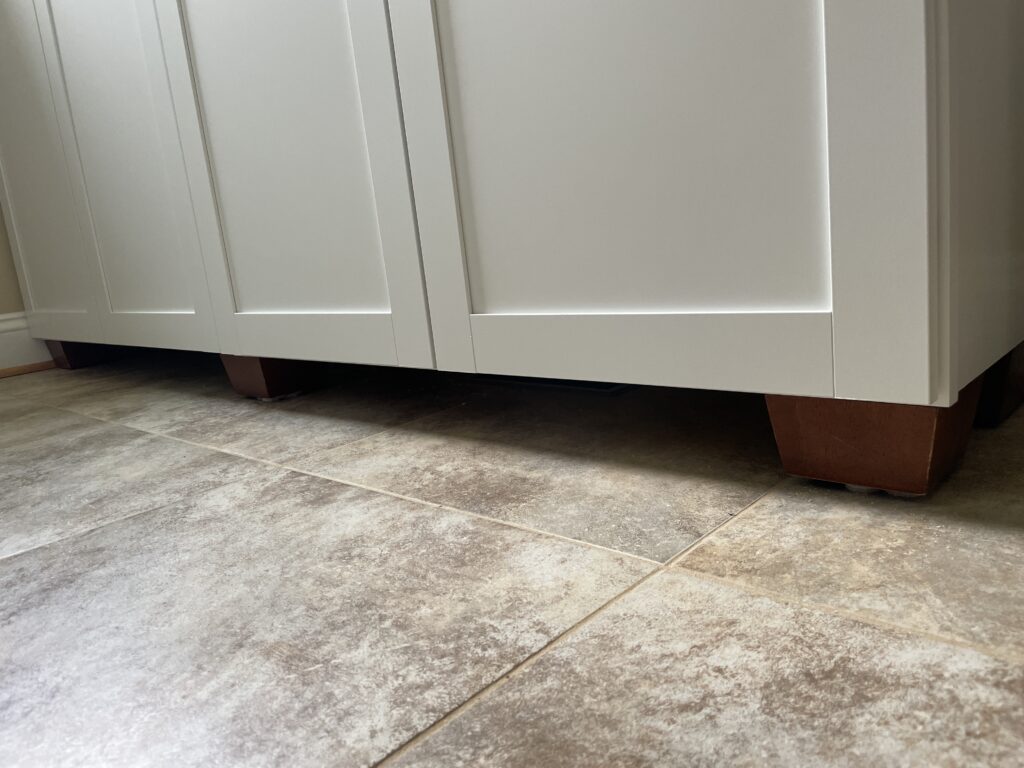
With the feet attached to the bottom of these cabinets, space remained for the baseboard trim. This gave the appearance of a piece of furniture, rather than cabinets mounted to the wall. What made this so functional, is the HVAC vent in the laundry room floor, was under the cabinets. Without having to build a base frame for the cabinets, and extending the vent to the face of the cabinet base, elevating the cabinets via feet allowed for efficient airflow underneath.
Cabinet Hardware
I chose small, blunt knobs that would be less likely to snag pockets when walking by.
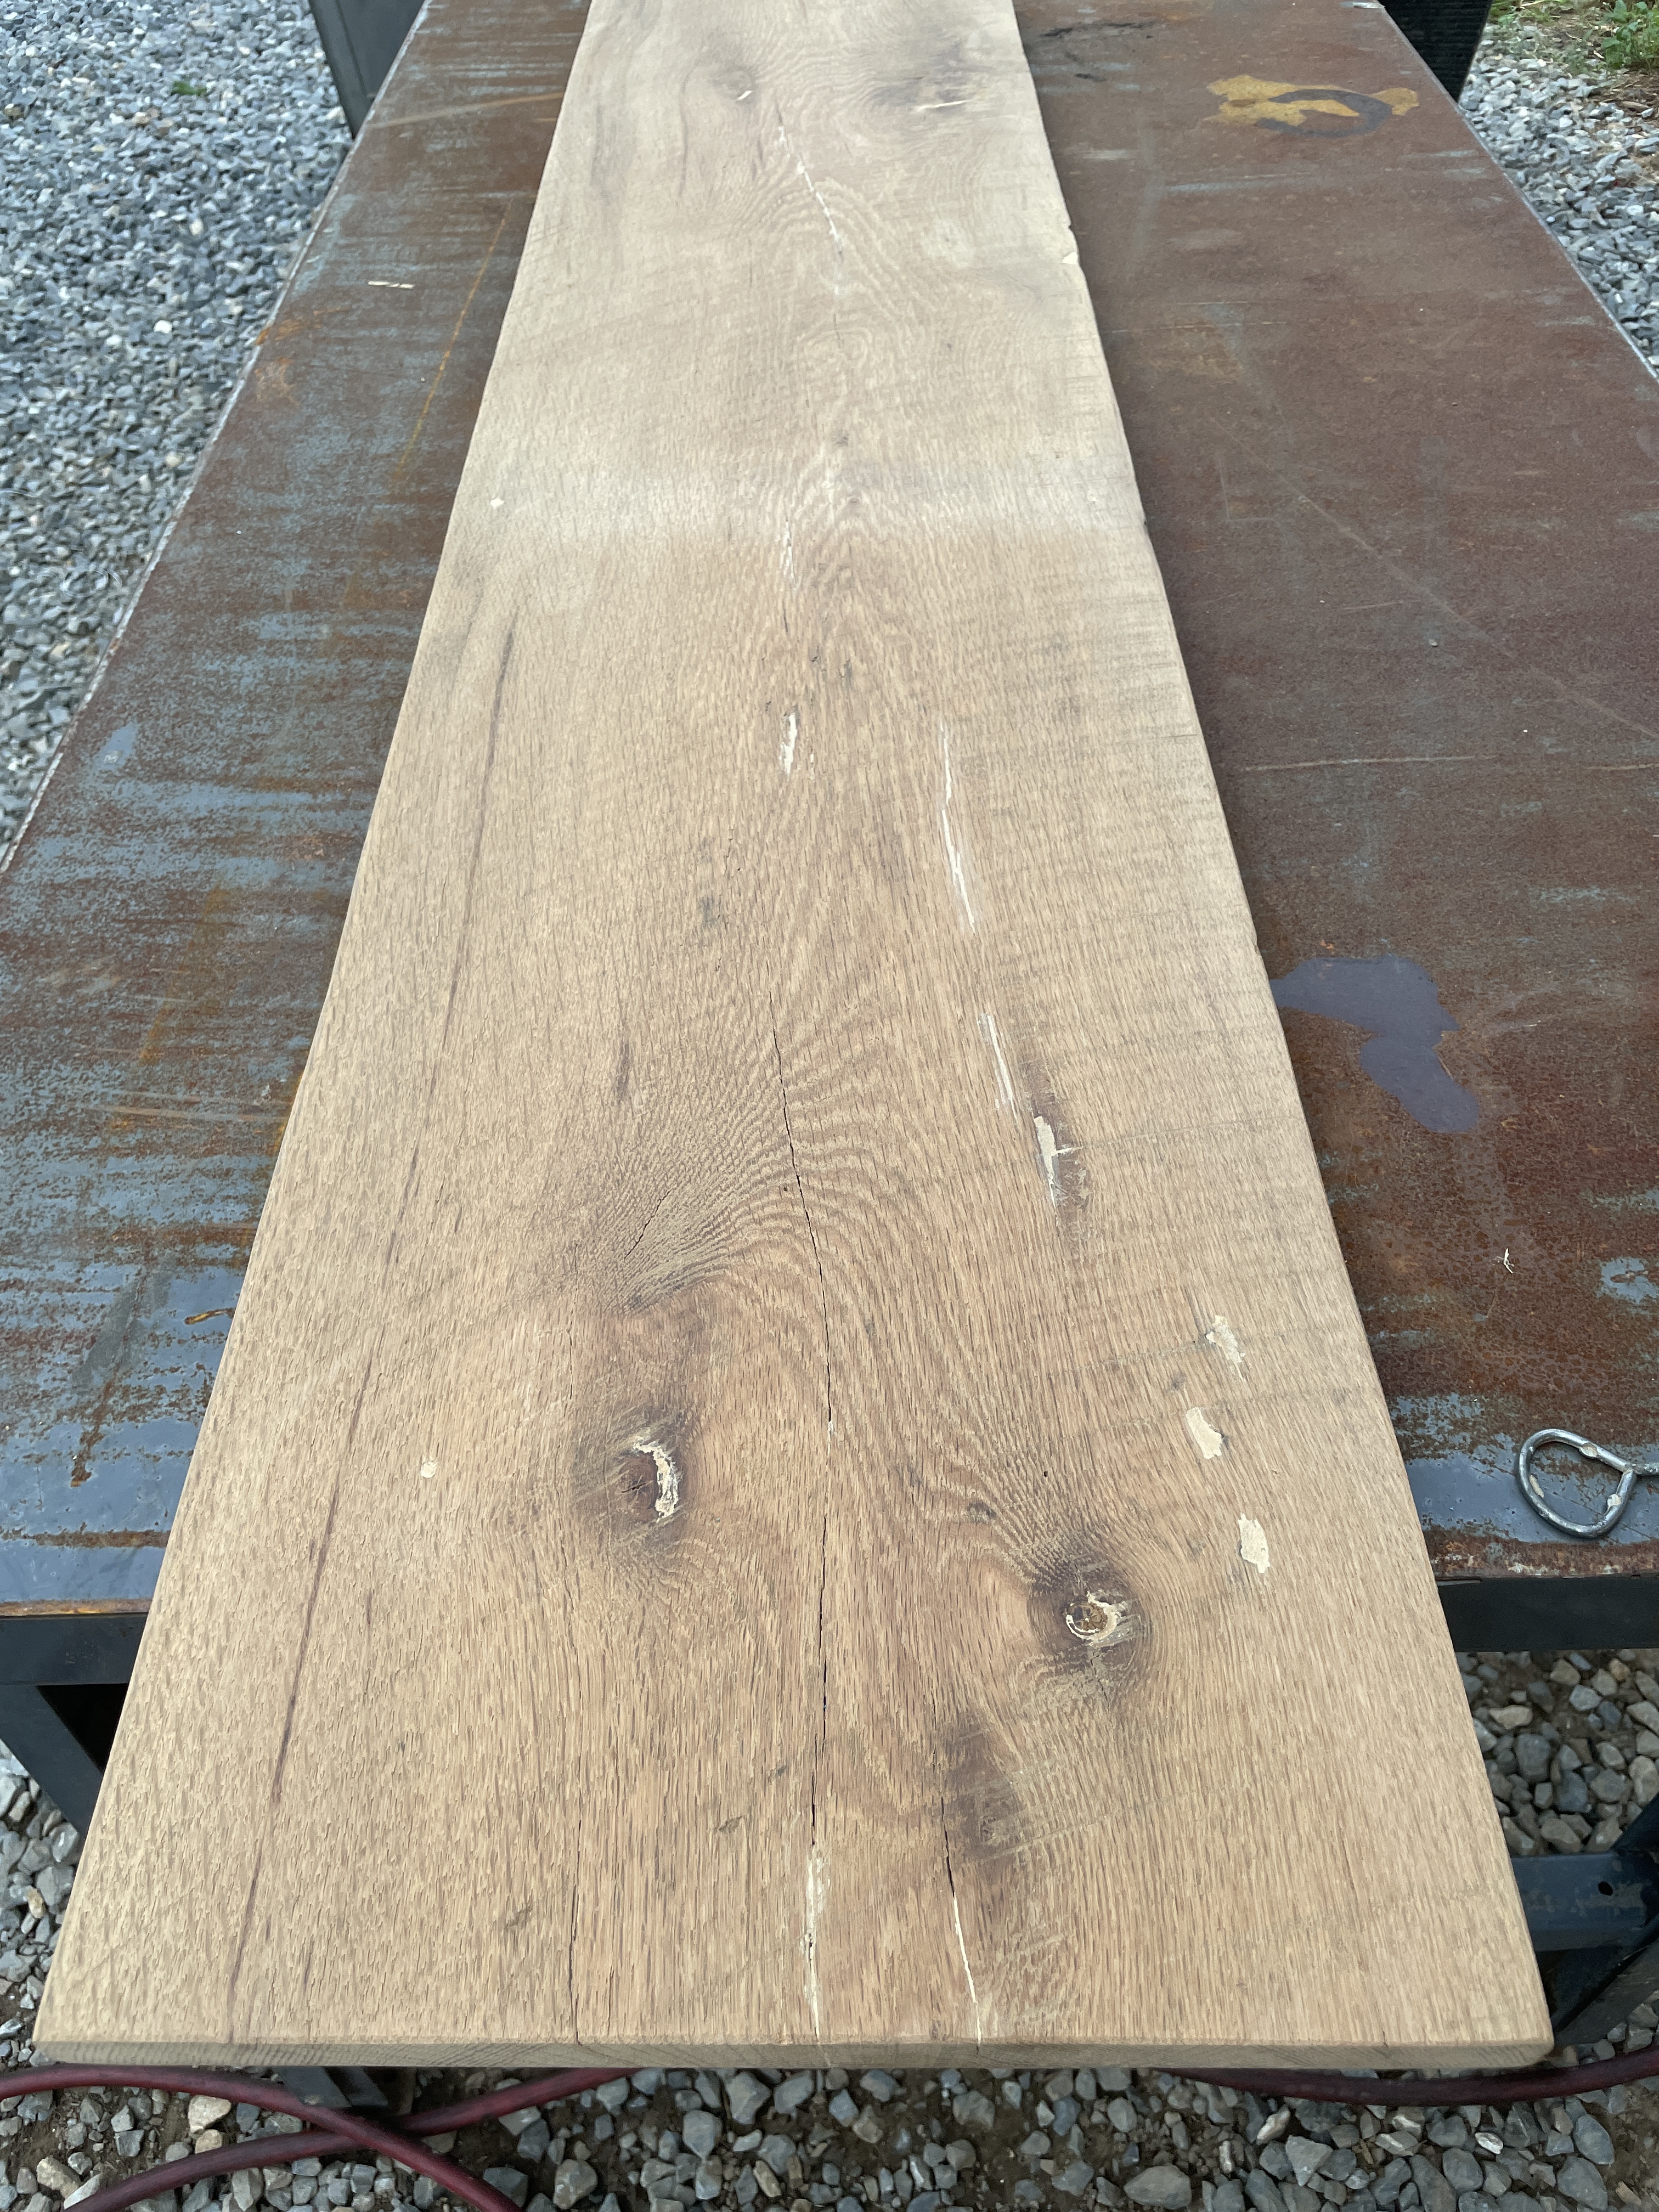
The Countertop
Ideal for a Budget Laundry Space
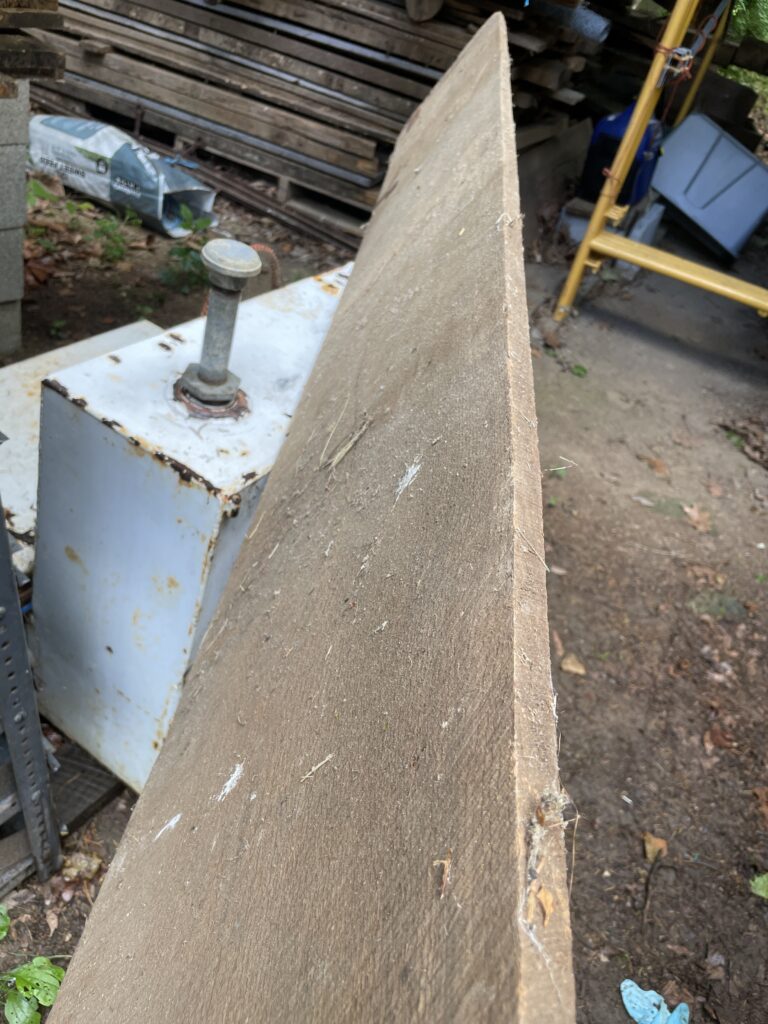
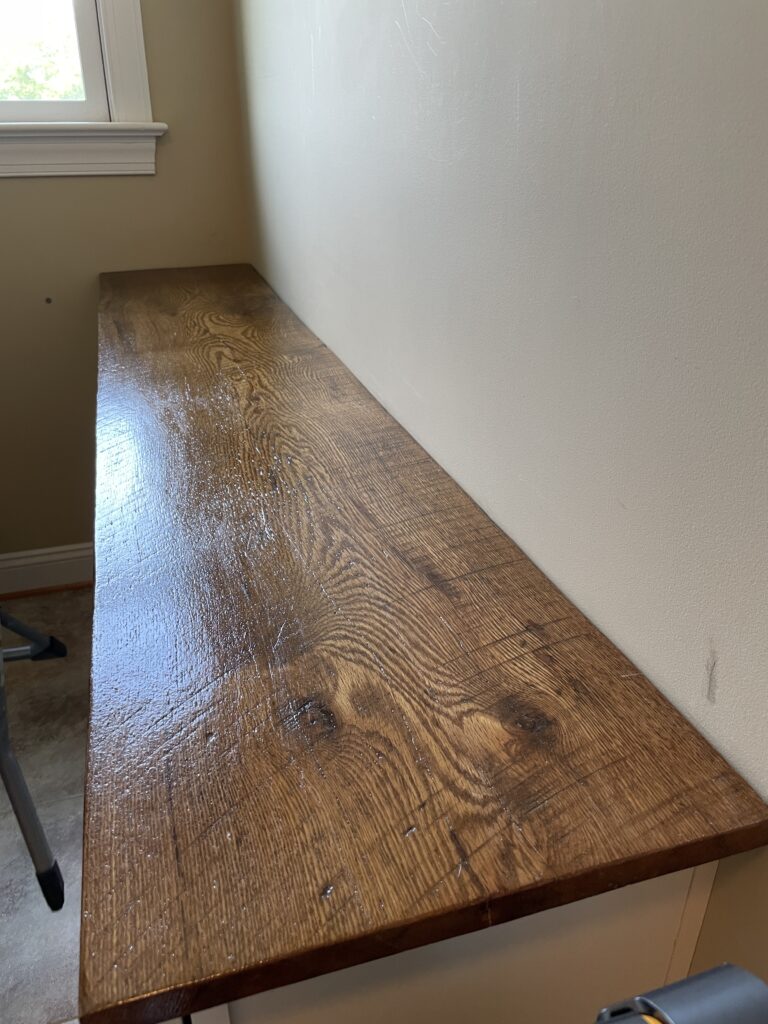
The countertop is were the character comes out in the room. It was 100 year old board from an old barn that was being torn down. It looked worn, drab, and had about 8 nail holes in it. The potential was released in the sanding and polyurethaning process. It was the perfect width to fit over the top of the cabinets. It fit well on the surface, with a slight overhang. The holes were filled with stainable putty. The board was sanded, until it was smooth. However, beautifully it still revealed the original saw marks.
Water Based Stain & Polyurethane
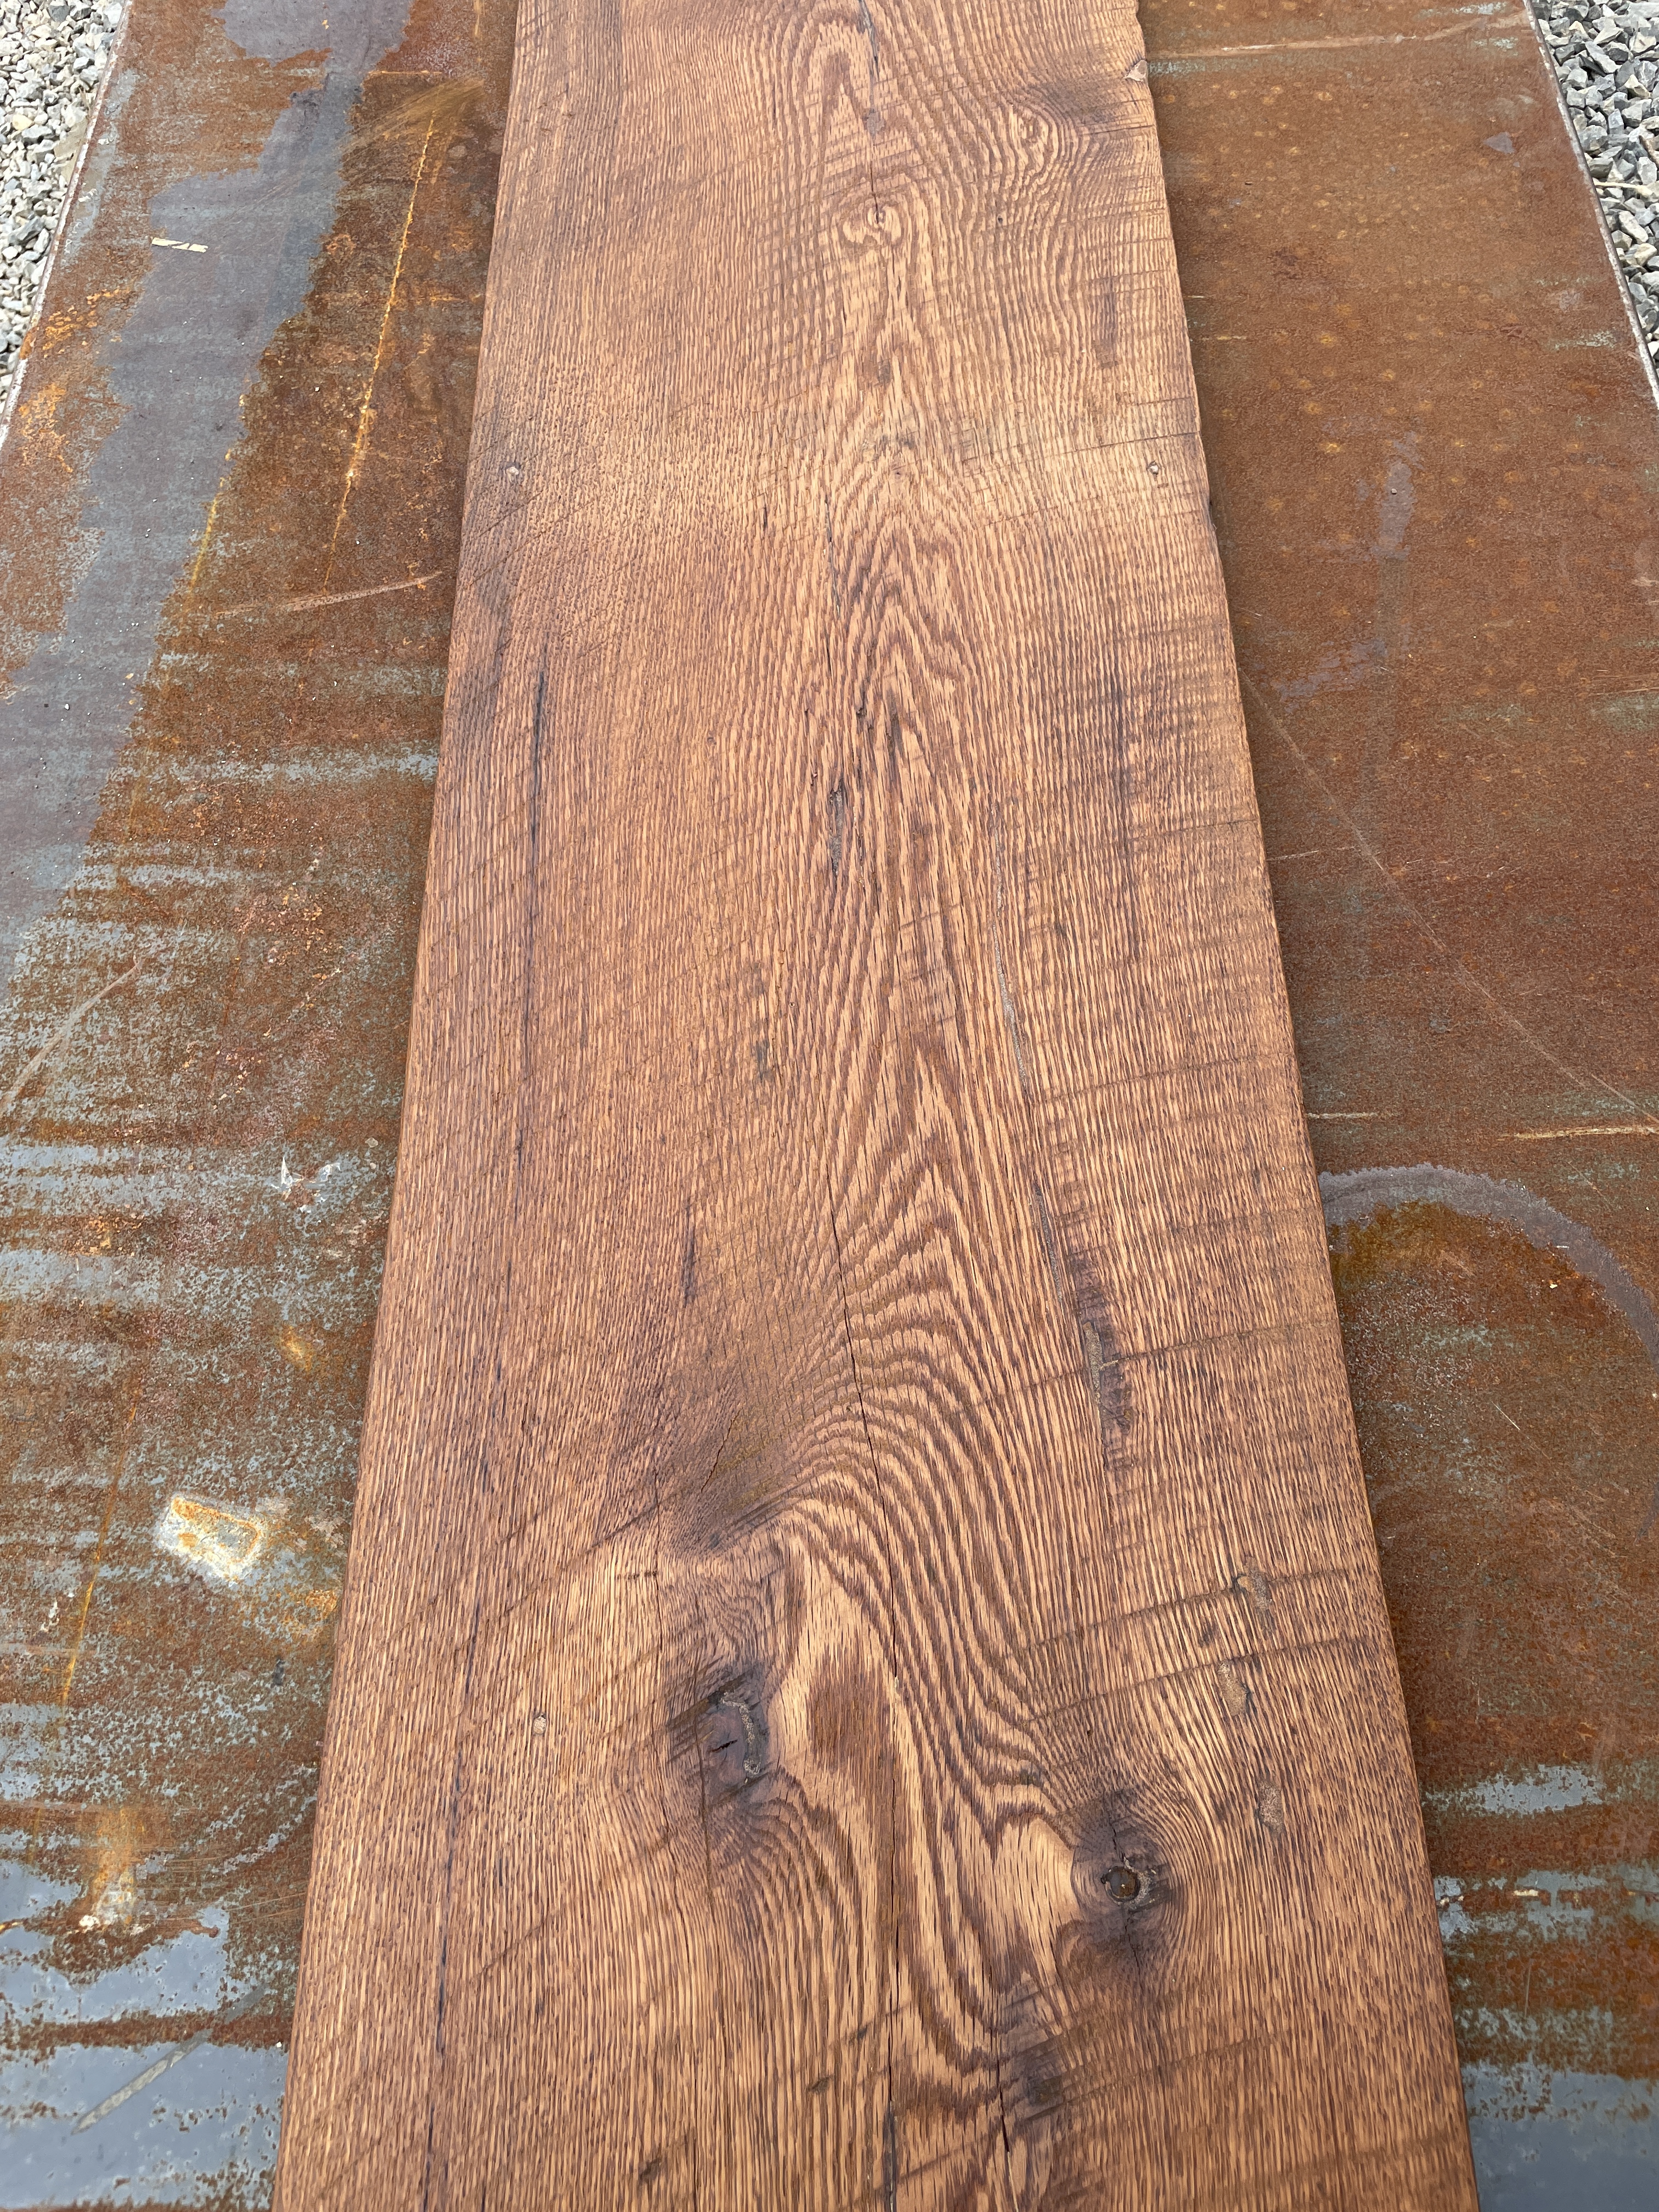
For this project, I used a waterbased natural stain. Even though the holes were filled with a stainable putty, the putty was somewhat resistant to accept the stain. A stain pen, that was darker than the natural stain I was using, worked well for those putty marks. Five coats of water based polyurethane were applied. I allowed a few hours of drying outside before lightly sanding and applying each coat of polyurethane. After the last coat, I allowed the board to dry untouched. The process lasted 2 days. Five coats ensured the board would not be susceptible to damage if wet clothes were left on the surface too long.
Laundry Room Problems & Solutions
- Problem – Lack of drying space and bulky drying racks taking up valuable floor space.
- Solution – Two extremely sturdy wall mounted aluminum drying racks that are rust and corrosion resistant – perfect for drying clothes. Max load 220 lbs and it folds flat against the wall when not in use. It’s a total bargain at less than $40 each, considering the poor quality of so many manufactured goods on the market these days.
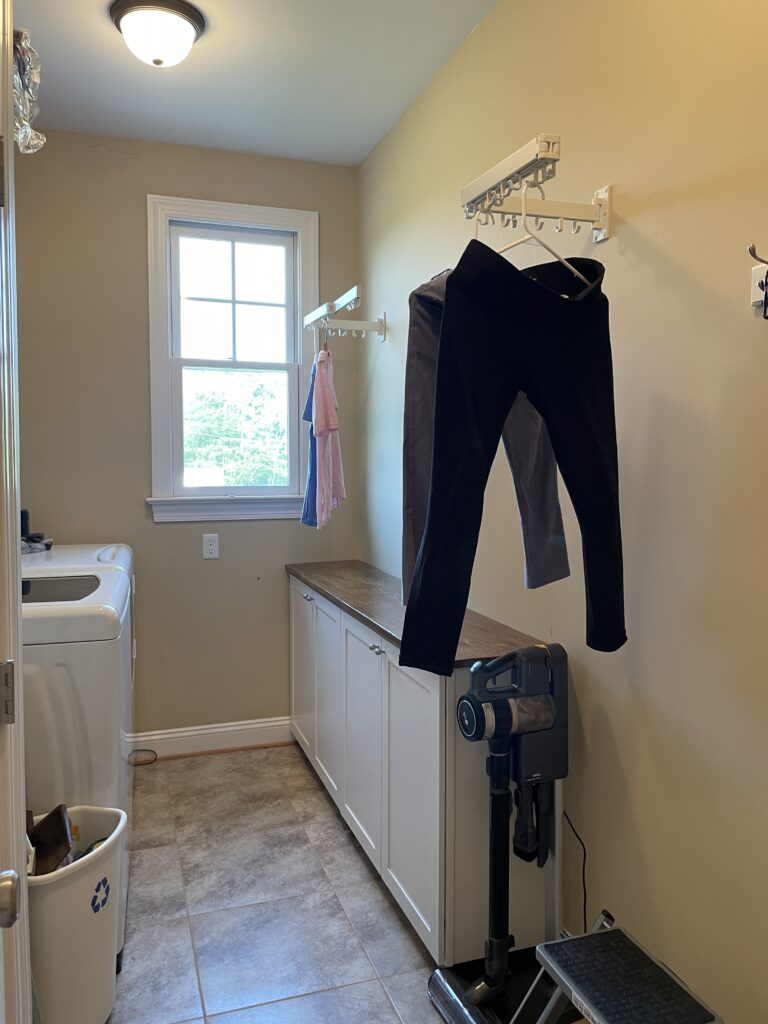
- Problem – Cluttered shelves
- Solution – Two wall cabinets used as base cabinets, plus a set of 6 jute plastic medium storage bins for the shelves. This allowed the shelves to appear less cluttered, while still housing a considerable amount of bottles and items.
Short Video Explaining the Process
Budget Laundry Room Mission Accomplished
As shown below, just installing two sets of 36″ x 12″ cabinets, along with 2 wall mounted, extremely sturdy, expandable hanging racks changed the appearance of the room significantly. Once the shelf clutter was replaced with baskets, the space was clean and organized.
This laundry room project was budget friendly, but that budget could be reduced significantly just by repurposing used cabinets. They are often found on Facebook Marketplace or Craigslist for mere dollars.
For more DIY ideas, follow us at Life in the Country USA and click on our DIY tab!