Metal Bed Transformation
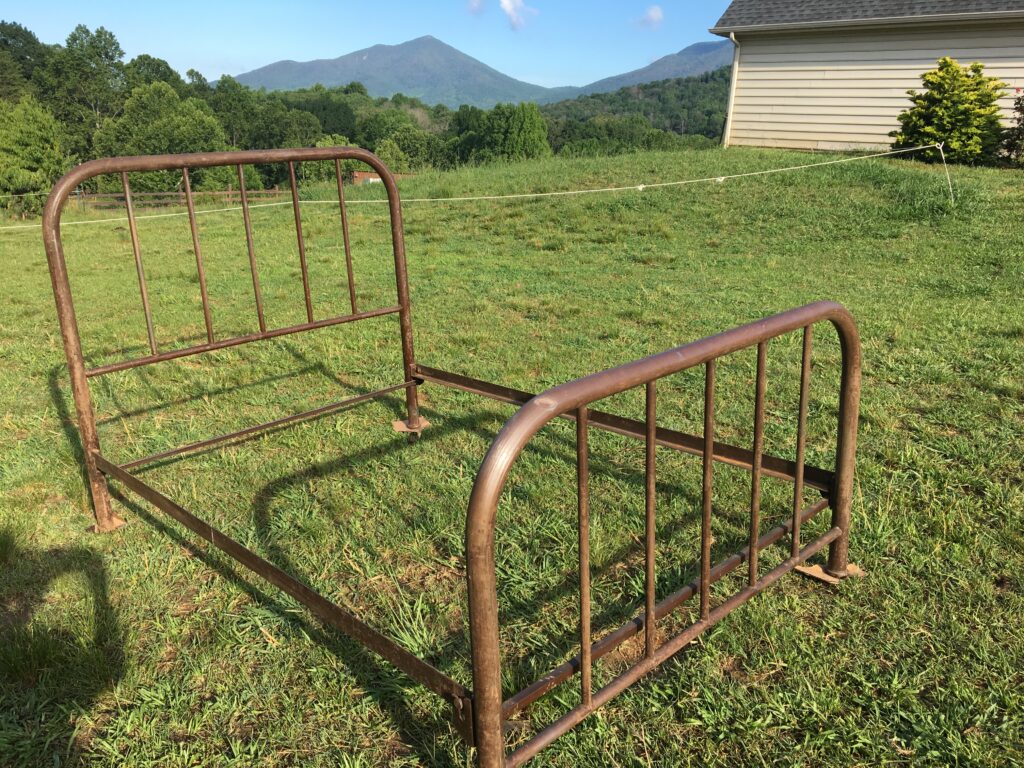
We’ve all seen them, those old brass, iron, or steel beds that are often found in antique or thrift shops, appearing bland and abandoned. Some still have a little sheen, and others look bronze and boring. However, a metal bed has LOADS of potential and promise. It’s like a clean slate, waiting to be primed, painted, and transformed so it can take on a style of its own.
I’ve painted four of these metal beds, and I would transform many more if I had the space. I have two from the 1920’s. That’s around 100 years old! There are so many great ideas for these beds on Pinterest. I’ve seen them rehabbed in traditional colors such as pewter, black, and bronze. However, finished pieces painted in colors like yellow, teal, and blue enhance traditional or even Boho and whimsical decor.
Budget
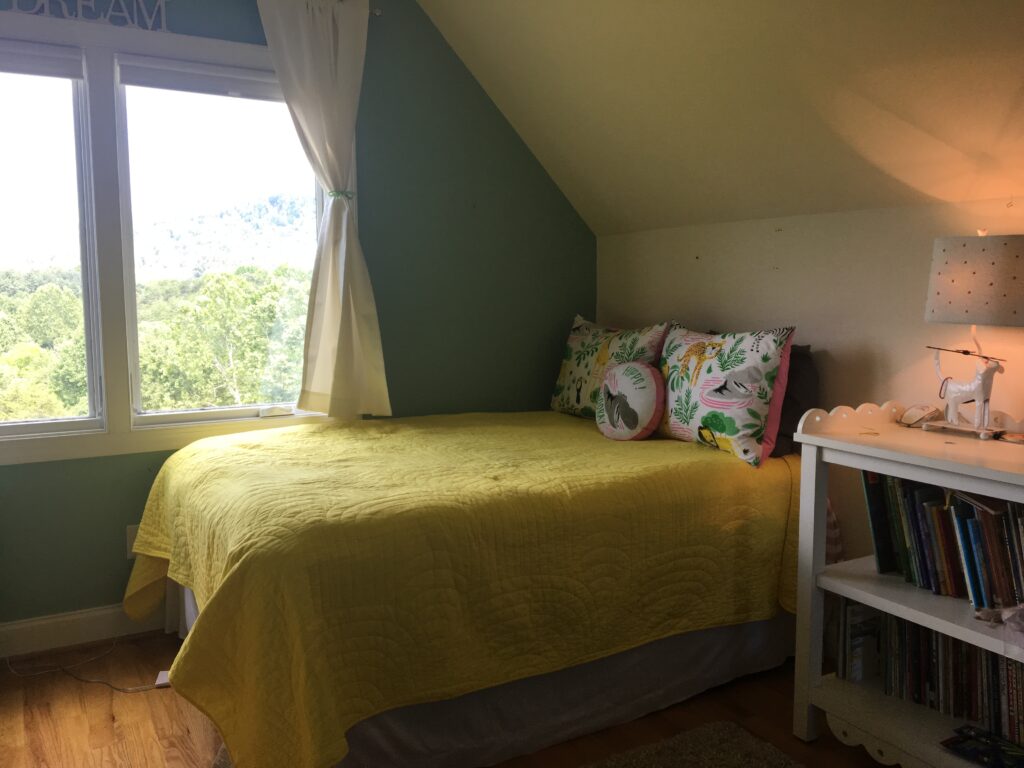
This is a budget friendly project. My daughter’s room looked plain. The room was longing for a splash of color, a transformation that wouldn’t break the bank, but would serve as an invitation to play, sleep, and just stay for awhile. That’s when the transformation began. Painting metal beds was not an expensive project. I purchased both beds from Facebook Marketplace. The full bed was $100 and the twin was $50. Paint was less than $25 for each bed. Combined, both beds were purchased and painted for a total of $200. They are sturdy, don’t creak or sqeak, and they look great.
Child’s Room Metal Bed DIY
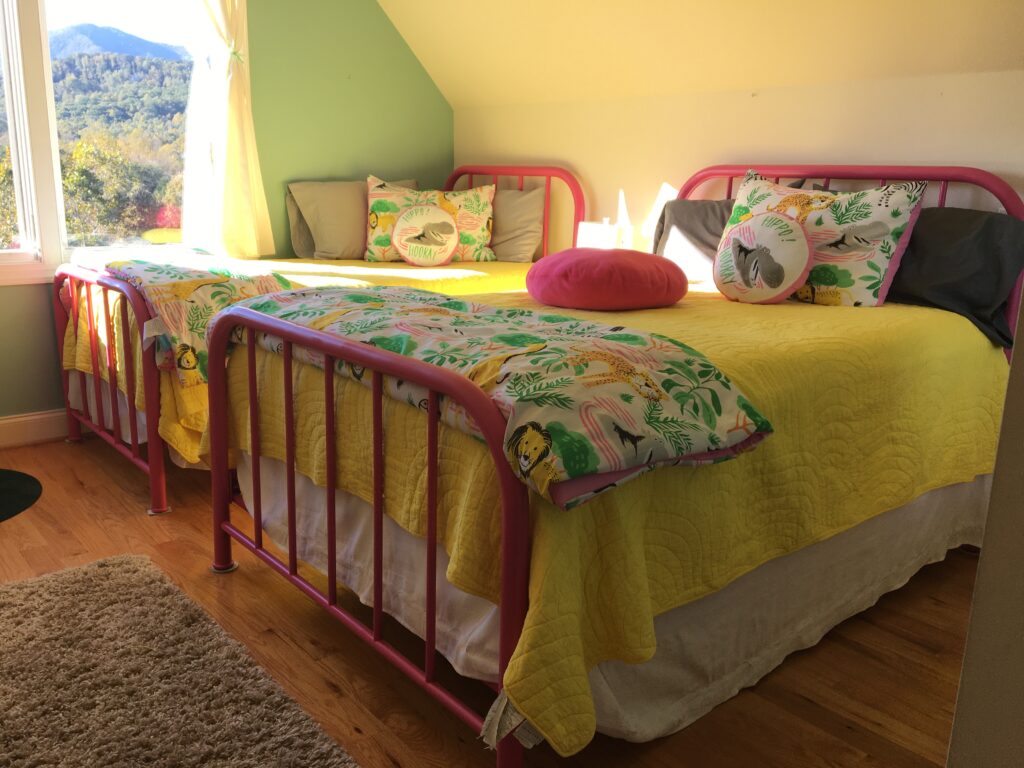
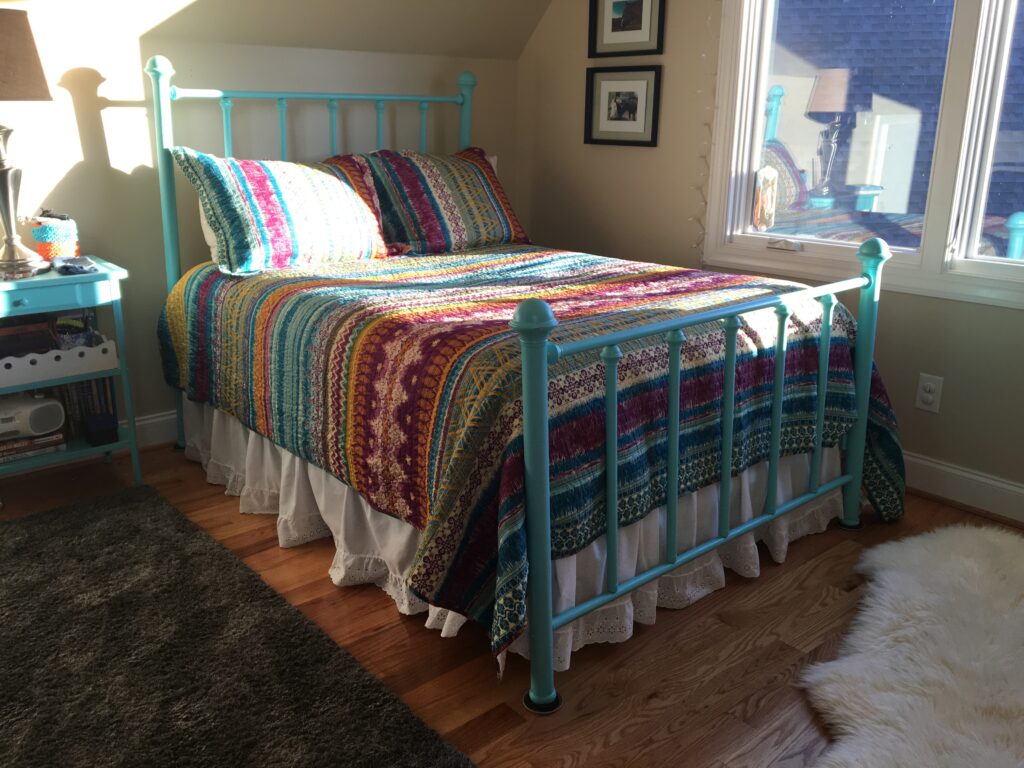
My latest DIY painted metal bed transformation was two old beds that I picked up for my daugther’s room. I wanted a full bed for her, since she’s a restless sleeper. She also needed a twin in the event that guests would visit and stay in her room. Then there are those fun nights where she has sleepovers when her grammy visits and stays in her room. It’s just nice having that extra bed for guests. When I look at the finished product, it makes me happy.
The Process
Each metal bed needed a light sanding and dusting, followed by a good quality primer. For this particular project, I used Rustoleum’s Painter’s Touch 2x UltraCover Paint+Primer https://amzn.to/3kctYnC. Having the paint and primer in a combo meant an application that was thicker and more robust than many other brands of metal spray paint out there. We’ve experimented with various paint brands, but we’ve found that Rustoleum consistently outperforms. When I’ve used other brands, they have required double the amount of paint. Each Rustoleum application looks uniform, adheres well, doesn’t run as easily, and dries smooth.
This DIY is best completed outdoors or in an open, well ventilated area. There is an ideal air temperature of 50-90 degrees for application and the cleanest finish. Avoid windy days.
I applied mulitple coats to each metal bed, including the side rails. Initially, I applied 2 coats. I then appied a 3rd coat to areas that would come in contact with hands, pillows, and bedding. For instance, the front of the headboard, the footboard, and the tops of both. I was careful to fan in that 3rd coat, so it blended nicely.
My initial thought was, “Yikes, this is bright!” However, pulling it all together really popped. The accent wall, bed color, yellow quilts, and printed comforters at the foot of each bed, really brought the space to life.
The bed dried nicely outside in 3 hours or so. I then brought it indoors and set it up to cure for 48 hours, before adding the mattress and box springs. It did have a bit of an odor, so I had my daughter sleep in another room for a couple of nights.
Paint Tips
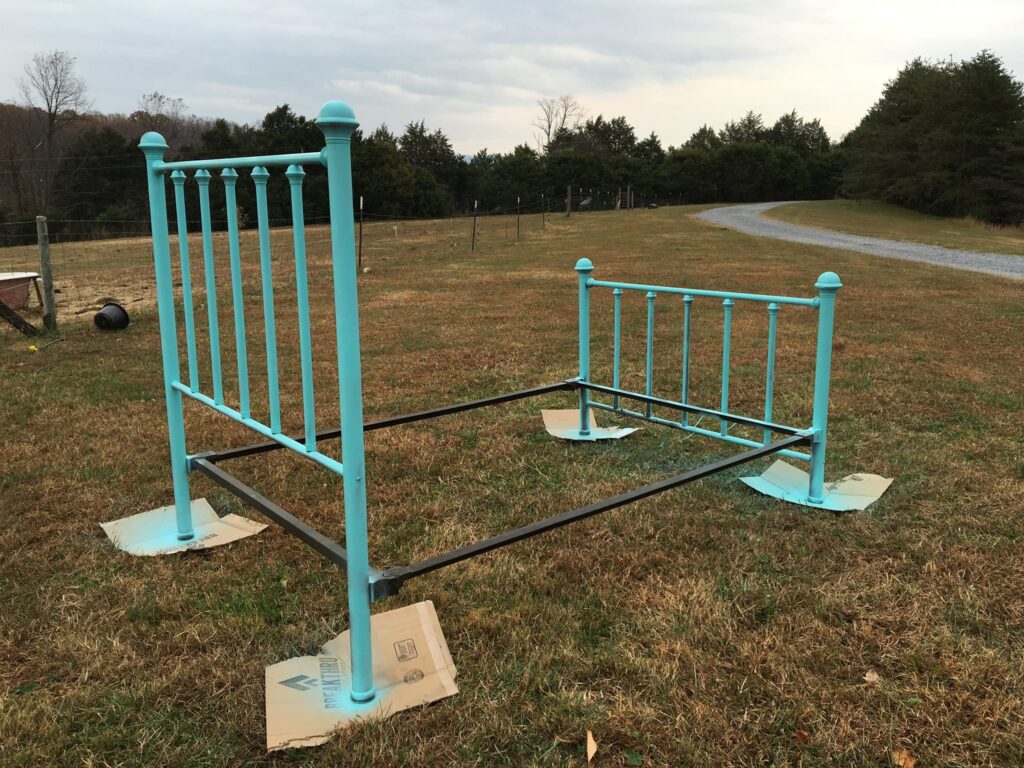
Place your metal bed away from any surface that could be affected by paint overspray. When I set up my project pieces outdoors, I always place cardboard under the legs or feet. Otherwise, grass, rocks, and dirt can get in the way.
There are definite techiniques for spray painting that will produce a successful final outcome:
- Assess the metal to see if it needs any light hand sanding to remove old flaking paint or rust. Don’t sand too much, making visible scratches or gouges in the metal. This will show up when the paint is dry.
- Prep the metal to ensure it is clean and free of residue. Wait until dry before painting.
- If the paint doesn’t include a primer, use a metal primer first. https://amzn.to/3k4ECgk
- Shake can well.
- Apply light, even, sweeping coats. Avoid spraying in one area without sweeping. Too much paint concentrated in a single area will cause a thick circle to form and subsequent running. Hold the can about 10-12 inches from the surface.
- Shake can periodically.
- Allow ample time to dry. I always carry my finished pieces indoors with gloves, so I don’t risk leaving fingerprints in paint that hasn’t completely cured. I also carry the pieces with my fingers on areas that aren’t as visible in the event that my hands could leave a mark on the paint.
Lessons Learned
I have found that if applied during the summer months, or on a warm and sunny day, the metal easily becomes too hot to paint. Spray paint applied to hot metal tends to bubble, or dry with a texture. I have learned the hard way to set up my bed frames right before painting, and not during the hottest part of the day! I’ve also learned when there’s significant humidity or moisture in the air, paint adheres differently and may lose it’s lusture.
My experience has been that the average full sized metal bed has required about three 12 ounce cans of paint. However, I typically buy 4 and return one. That way, I have all the supplies that I need to complete the project without stopping midway to run to the store.
Finished and In Place
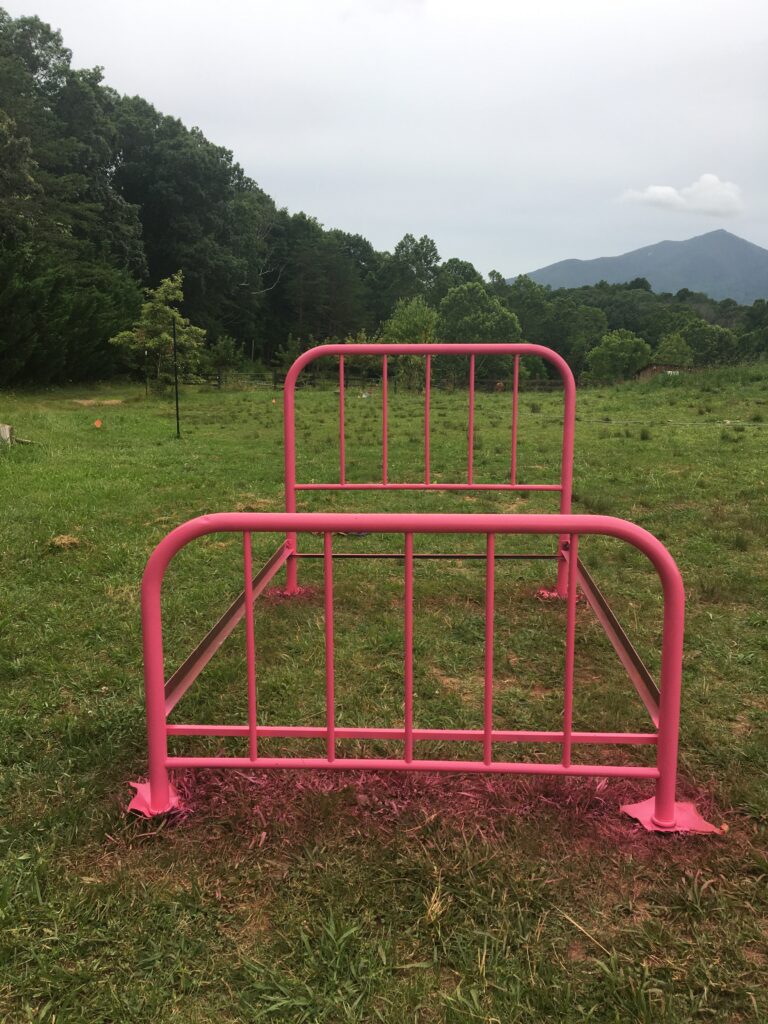
These metal beds were painted with Rustoleum Gloss Berry Pink https://amzn.to/3kctYnC. However, my daughter was 6 at the time and now that she’s 9 years old, the paint looks great, but I’ve had to pass up on bedding that we loved because it wouldn’t necessarily match her bed color. In hindsight, I may have chosen a color that she wouldn’t outgrow so quickly. Just changing the color of her accent wall would give us many more options though.
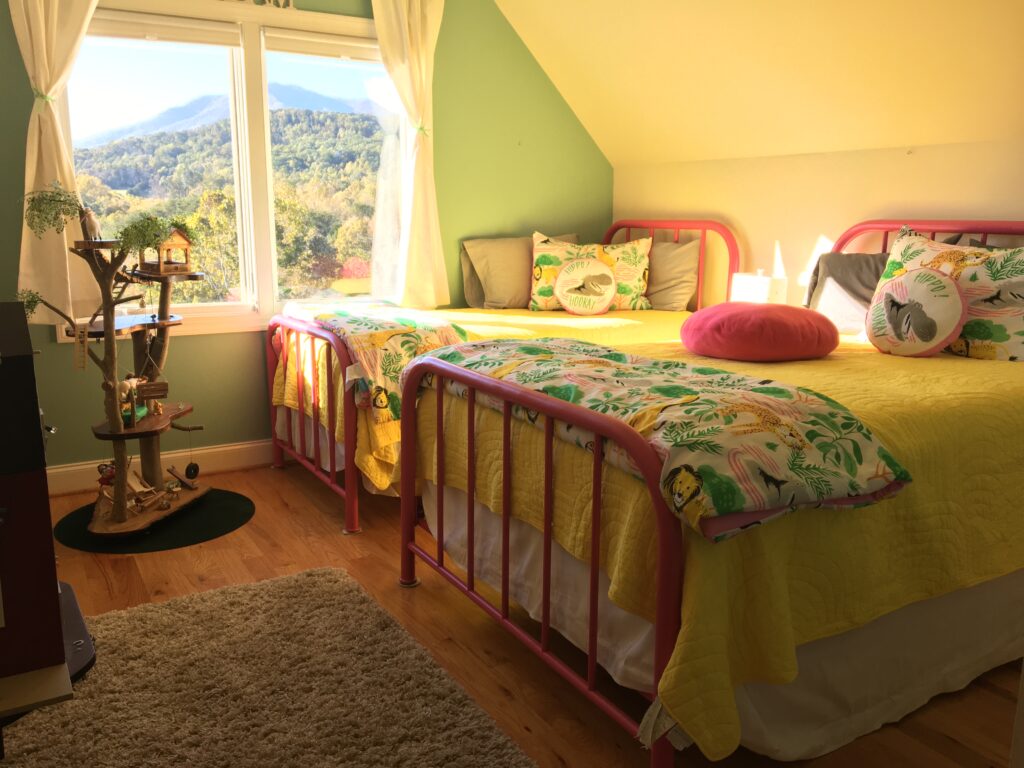
See that treehouse at the end of the bed? Check out my blog post on how to DIY an indoor treehouse that any kid would love! https://lifeinthecountryusa.com/indoor-treehouse/
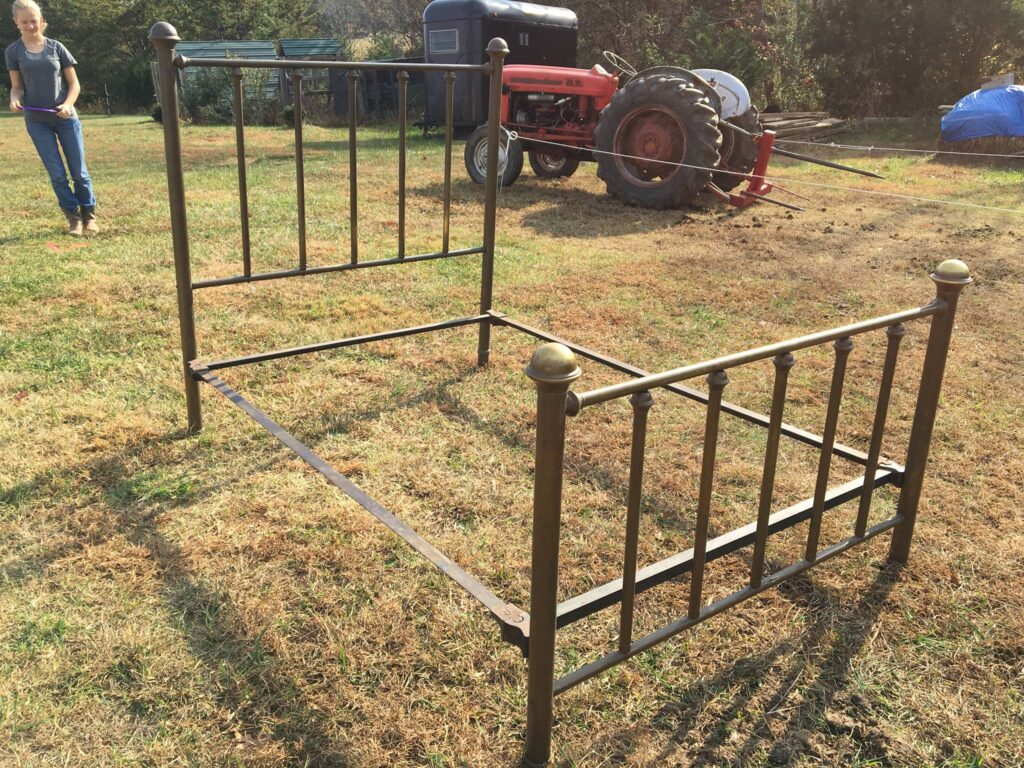
Brass Bed Transformation
This bed was painted the same as the iron bed above. First, it prepped by cleaning and light sanding.
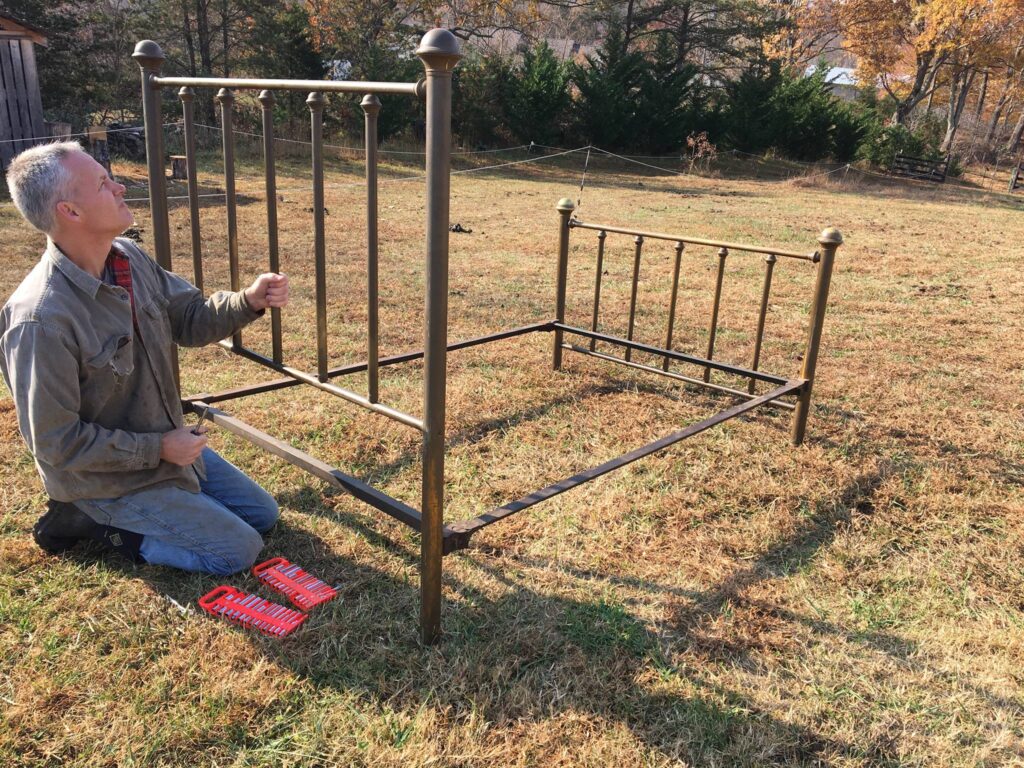
Next, it was sprayed with Rustoleum paint & primer.
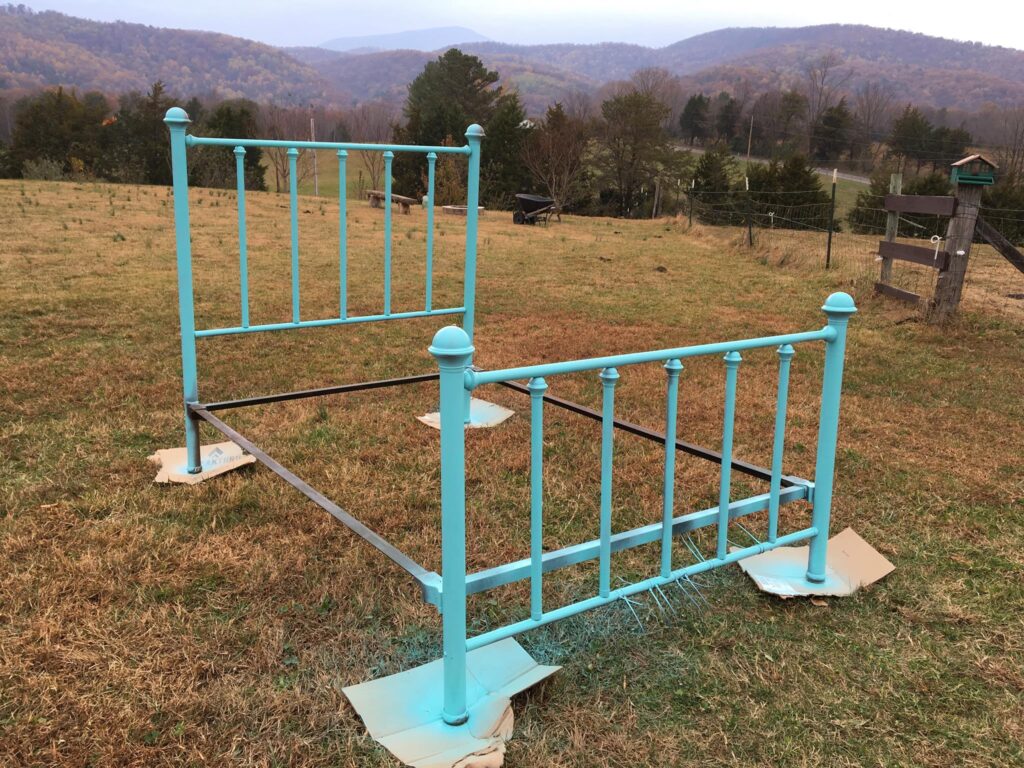
Here’s the finished product. Color really communicates a certain vibe!
You Can Do This
The great thing about painting a metal bed is that a beginner can successfully do this! Aside from prep supplies and paint, make sure you are protecting and “prepping” yourself. You’ll need a mask, safety glasses, and thin disposable gloves.
Assess the weather and choose a day that is over 50 degrees with no wind, a minimal breeze at most, and no dust or pollen. Prior to painting, allow time to scuff or sand, clean, and dry. I often do all of my prep the day before and then set up everything else early the next day so that I have time to paint and allow drying between coats. That’s when looking at the forecast comes in handy. You don’t want the bed partially dry, only to have a shower or thunderstorm roll up and ruin your beautiful paint job.
Finally, have fun! You’re gonna do great, I just know it!
If you like this DIY project, and feel ambitious and ready to take on something larger outdoors, check out my blog post on building a DIY greenhouse, she shed, or man cave https://lifeinthecountryusa.com/diy-greenhouse-shed-she-shed-man-cave/.